From opening your first file to a validated preset. Every part of the
app, sorted by topic. If you're looking for something specific, use the
table of contents on the left.
1. The basic principle
Patefact edits files, not devices. The app never
connects to your network and never talks to any hardware. It reads a
preset file, displays its contents as a matrix, lets you change anything
in it, and writes the file back out.
The workflow is therefore always the same:
In your control software, save the preset as an XML file while the devices are still on the network.
Open the file in Patefact and edit it wherever and whenever you like.
Load the saved file back into the control software.
Important: Always test a changed preset in a
non-live environment first. Loading a faulty preset can interrupt
existing audio connections.
2. Opening a preset
There are four ways into a preset:
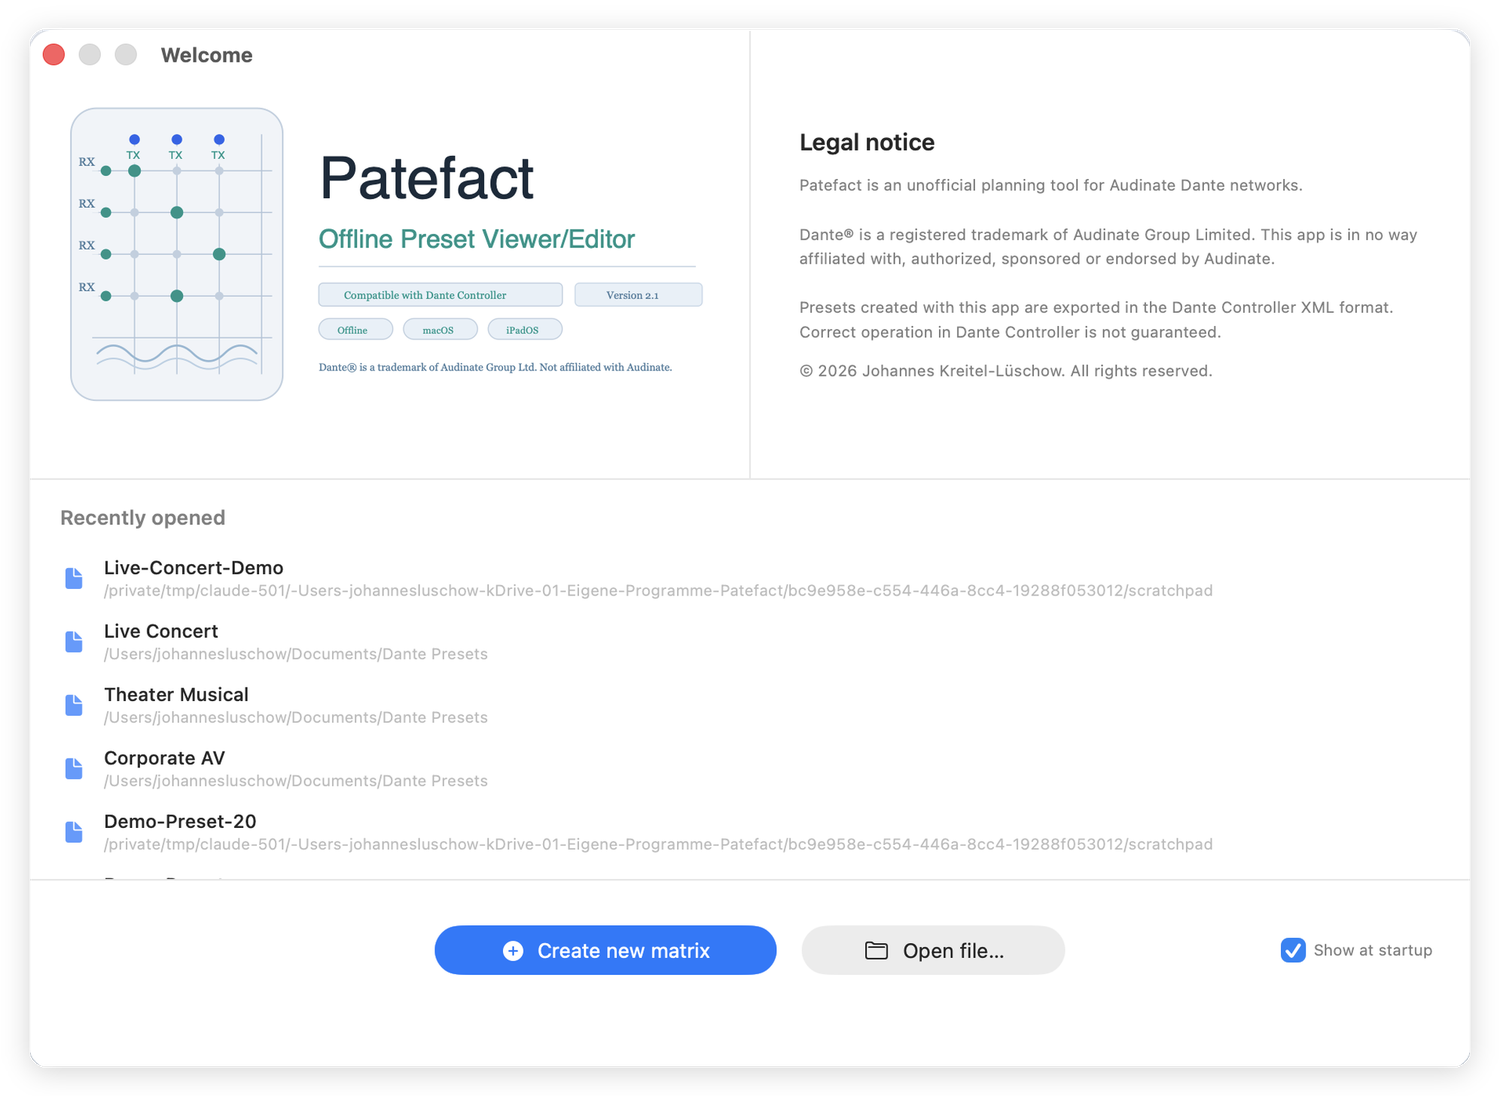
Welcome window: A list of recently opened files appears on launch. One click is all it takes.
File → Open or ⌘O
Drag & drop: Just drag the XML file onto the window.
Start fresh: "Create New Matrix", or ⌘N, creates an empty preset into which you add devices by hand.
The welcome window can be switched off via the "Show at Launch" checkbox,
if you'd rather land directly in a document.
If Patefact detects a preset version it doesn't recognize, a notice
appears when opening. The file can still be viewed, but individual
fields may differ.
The welcome window with recently opened presets.
3. Reading the matrix
The matrix is the heart of the app. It shows which signal goes where, and
is always laid out the same way:
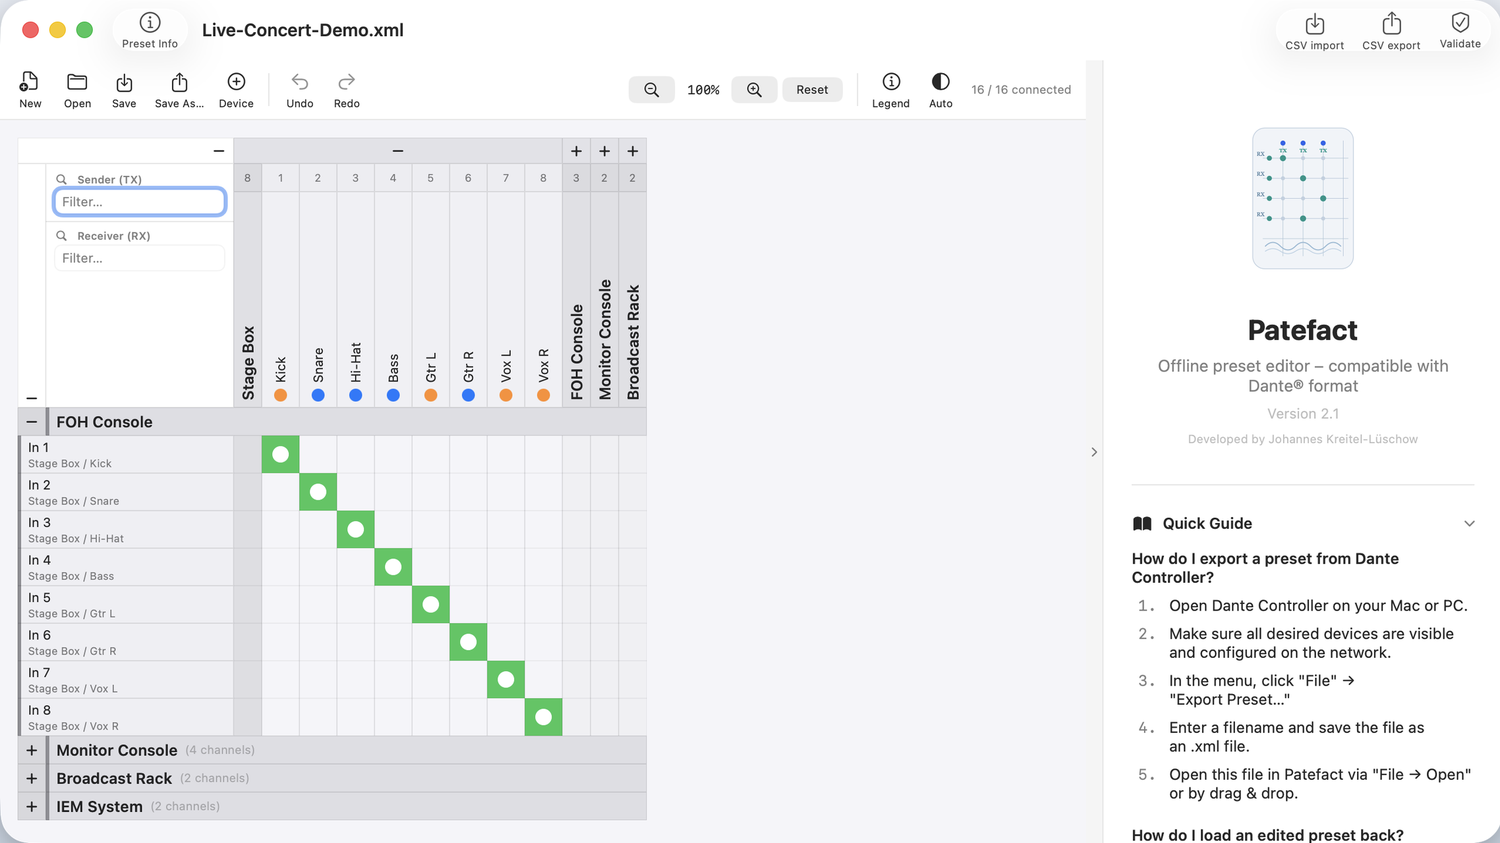
Along the top, labeled vertically: the senders, i.e. each device's TX channels.
On the left: the receivers, i.e. the RX channels. Below each channel name, small text shows what it's currently connected to.
In the grid: the intersection points. A filled dot means that receiver is subscribed to that sender's signal.
Devices are groups. Clicking a device name collapses or expands its
channels, so you keep an overview even with many devices. Next to the
name it shows how many channels the device has.
The counter in the toolbar
Top right you'll see something like 16 / 16 connected. The
second number is the total count of receiver channels in the preset, the
first is how many of them actually have a source. If the numbers differ,
there are unfed inputs. That doesn't have to be an error, but it's the
fastest clue that something is missing.
Legend
The Legend button shows what the colors and symbols
mean: which dots are active connections, what sender and receiver
markers look like, and how incompletely captured devices are marked.
Senders on top, receivers on the left. Every green dot is an active connection.
4. Navigating large networks
Filters
Above the matrix are two separate search fields: one for
senders (TX), one for receivers (RX).
They work independently. Type a device name on the left and only its
receiver channels stay visible; type something at the top and the column
selection narrows. That way you can carve exactly the slice you need
out of a network with hundreds of channels.
If nothing matches the filter, the app says so explicitly instead of
showing an empty area.
Zoom
The magnifying-glass buttons shrink and enlarge the matrix, the
percentage next to them shows the current level. Reset
restores 100 %. Zoom is useful when you either want to see many
channels at once or need to hit a single intersection point precisely.
Appearance
The button with the half-filled circle switches between
Automatic, Light and Dark.
Handy if you work in a bright office during the day and a darkened
production room at night.
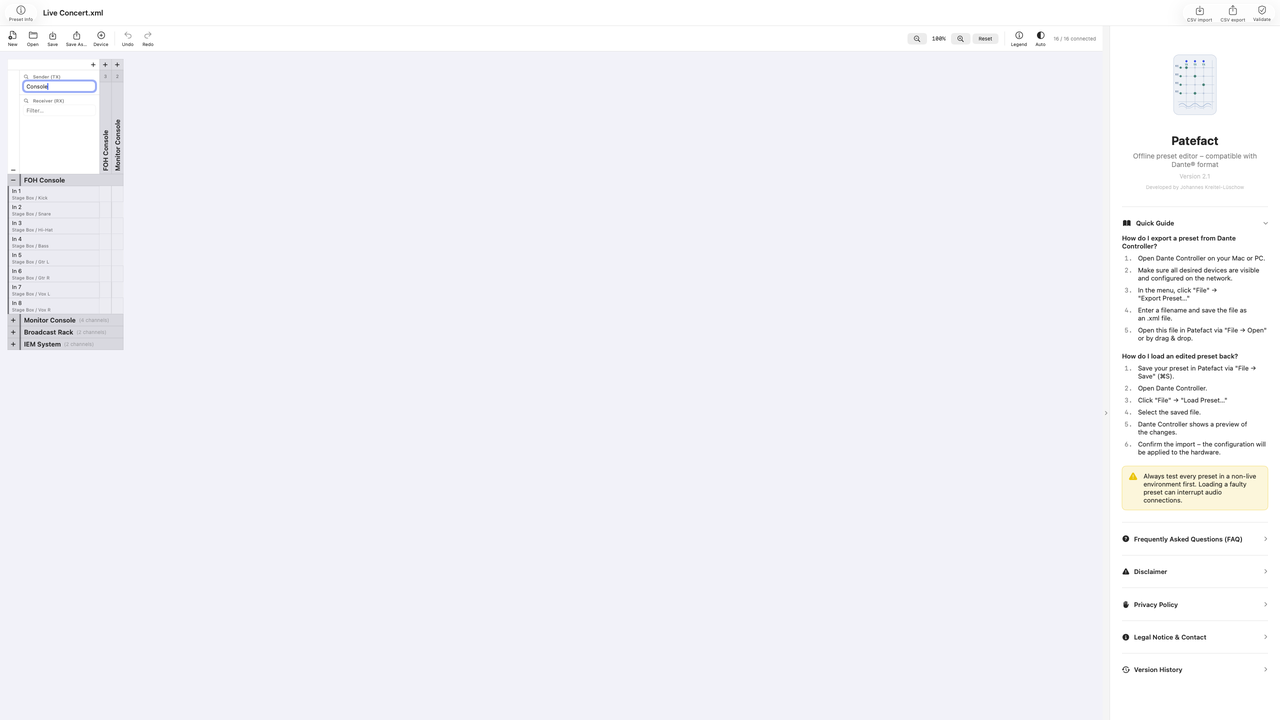
The sender filter "Console" narrows the columns to just the two
consoles. The expanded device shows below what each input is
connected to.
5. Making and breaking connections
This is the most-used action in the app, and it takes one click:
Connect: Click the intersection of a sender and a receiver. The dot appears, the connection is live.
Disconnect: Click an existing dot again. The connection is removed.
A receiver channel can only ever have one source. Connecting it
to a new sender replaces the previous assignment.
Tooltips
Hover the pointer over a sender and Patefact shows every receiver fed by
that channel. That answers "where does this signal go" without any
searching. How long you have to hover before the tooltip appears is set
in the app settings.
If something goes wrong
Every change can be undone: ⌘Z undoes,
⌘⇧Z redoes. Both commands are also available as
arrow icons in the toolbar. As long as you haven't saved, nothing is
final.
6. Devices in detail
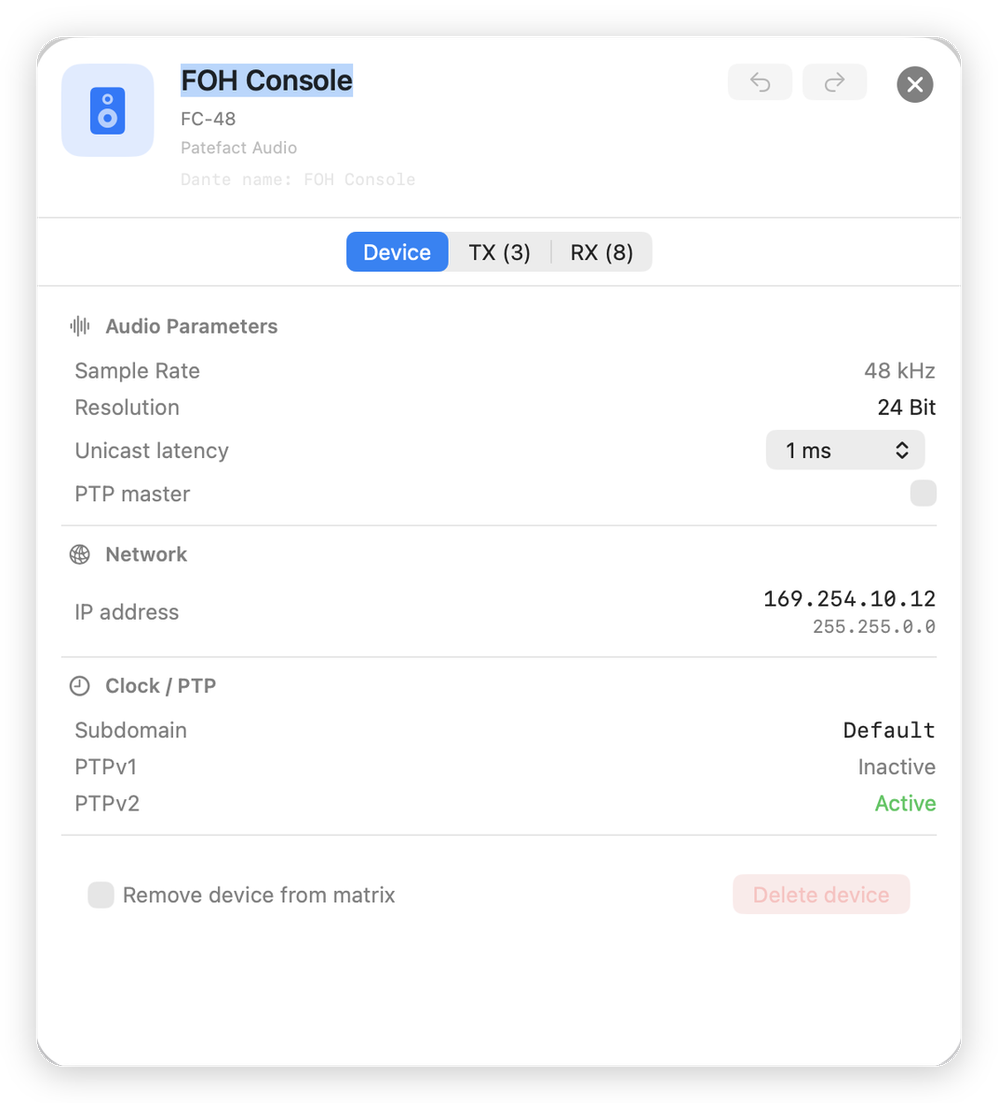
A double-click on a device name in the matrix opens the
detail view. (A single click just collapses or expands the device.) The
view has three tabs.
The "Device" tab
This is where the device's properties live:
Audio parameters: sample rate, bit depth, unicast latency, and whether the device is PTP master. Latency is chosen from fixed steps from 0.25 ms to 40 ms.
Network: IP address and subnet mask, as captured at export time.
Clock and PTP: subdomain, plus the status of PTPv1 and PTPv2.
At the top you can change the display name. Below it,
unchangeable, is the Dante name, the identifier under which the device
appears on the network.
The "TX" and "RX" tabs
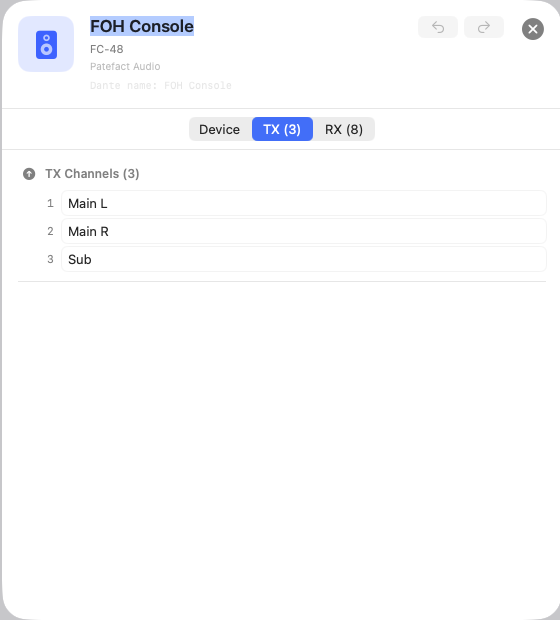
These list all of the device's sender and receiver channels respectively.
This is where you rename channels. The number in parentheses next to
each tab name tells you how many channels there are.
The device's sender channels, numbered and directly editable.
The toolbar at the top
Four buttons sit above the tabs, on the right:
Arrows
Undo and redo, scoped to changes on this device
Clipboard
opens Batch Rename (chapter 9)
Bookmark
saves the device to the device library (chapter 8). If it's already saved, the icon is filled in.
Cross
closes the detail view
Deleting a device
Delete lives at the bottom of the detail view, deliberately gated in
three steps so no device disappears by accident:
Check Remove device from matrix. Only this makes
the button next to it usable in the first place; before that it's
grayed out.
Click Delete Device.
Confirm the prompt Really delete this device?
The device is removed from the preset along with all of its channels. If
you cancel the confirmation, the app also resets the checkbox, so your
next attempt starts back at step one.
This cannot be undone. Unlike most changes in
Patefact, deleting a device cannot be reversed with ⌘Z.
That's exactly why the process is gated in three steps. If you're not
sure, save your preset under a new name first.
No orphaned connections. Receivers on other devices
that were fed by the deleted device are released automatically. No
dangling references are left behind for you to hunt down later.
If a device shows "captured offline", it wasn't
reachable from the control software at export time. Its channels are
known, but network and firmware data are missing. That's not a fault
in your preset, it's a property of the exported file.
The detail view with audio parameters, network and clock data.
7. Adding devices
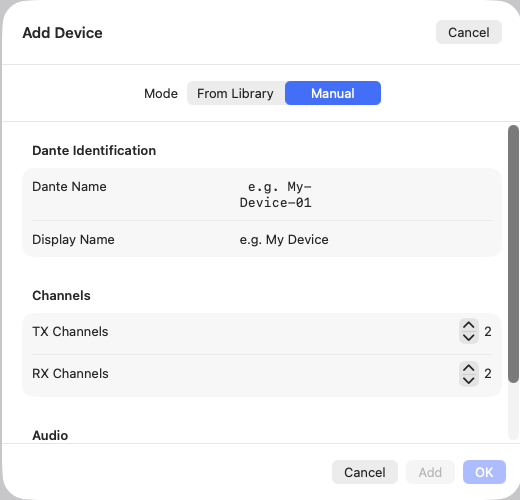
The Device button in the toolbar, or ⌘⇧N,
creates a device that doesn't exist yet in the preset. This is how you
plan installations whose hardware doesn't exist yet.
The dialog asks for:
Dante name: the technical identifier, e.g. My-Device-01
Display name: the readable name, e.g. My Device
Number of TX and RX channels
Sample rate
You set the default values for new devices once in the app settings, so
you don't have to configure them every single time.
In Manual mode you create a device by hand. The
switch at the top toggles to the device library.
8. The device library
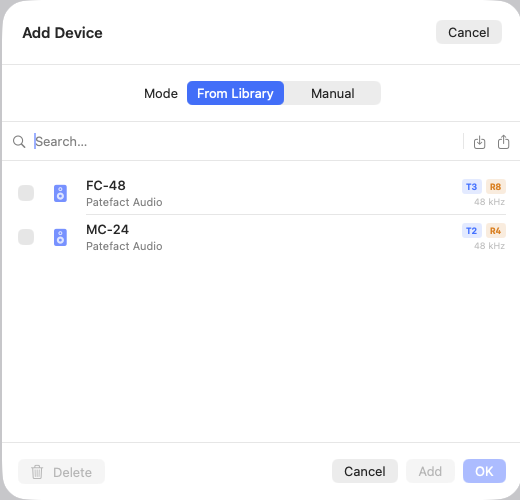
If you keep working with the same devices, save them once and recall
them afterward in two clicks. The "Add Device" dialog has a second mode
alongside manual creation for exactly this.
Saving a device to the library
Open the device in the matrix and click the bookmark icon.
It moves into the library along with its channel count and audio
parameters.
Using and maintaining the library
Search: A search field filters the list once it gets long.
Delete: Entries can be checked and removed in bulk. The app states the count beforehand, because this cannot be undone.
Export and import: The entire library can be saved as a file and read back in on another machine. That's how you share a device park across a team, or bring it to the iPad.
Saved devices with manufacturer, channel count and sample rate. Import
and export of the whole library sit top right.
The device library is part of Premium. In the free
version you can still create devices manually, they just aren't
saved permanently.
9. Naming channels
You rename individual channels in the device detail view:
double-click the device in the matrix, then switch to the TX
or RX tab and edit the name directly in the field.
Renaming does not happen in the matrix itself; a double-click there
always opens the detail view instead.
Connections stay intact. If you rename a sender
channel, Patefact updates every receiver pointing to it. Routing
therefore survives the rename instead of breaking, which is exactly
what would otherwise happen easily, since connections in the preset
are defined by name rather than a fixed identifier.
Patefact also keeps names unique within a device automatically. Assign
the same name twice and the app appends a number, instead of leaving the
file unusable.
Renaming in bulk
Naming forty-eight channels one at a time is an evening's work. With
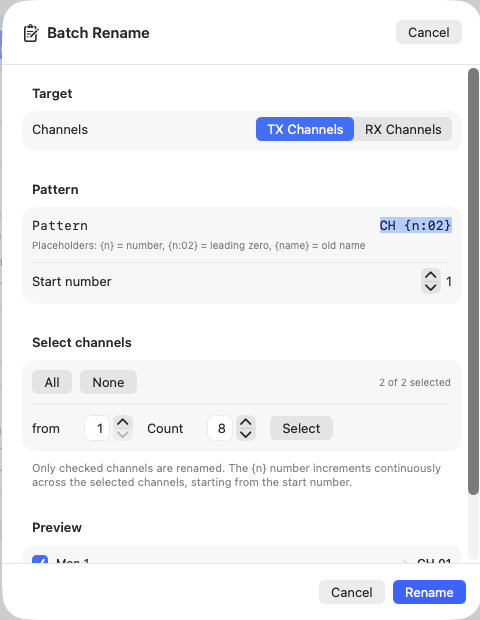
Batch Rename it's one operation. You reach it from a
device's detail view via "Rename channels in bulk".
You get there through the clipboard icon in the detail
view's toolbar.
Choose the target: sender or receiver channels.
Enter a pattern and set the starting number.
Select the channels. All and None
toggle the whole list. For a subset, use the range picker below:
from channel X, count Y, then select. That
lets you grab channels 9 through 16 without checking eight boxes one
by one.
Check the preview, which shows the old and new name
for every channel, and confirm with Rename.
The pattern CH {n:02} produces CH 01, CH 02, CH 03. Top
right shows how many channels are currently selected.
Three placeholders are available in the pattern:
{n}
running number, starting at the starting number
{n:02}
the same number with a leading zero, i.e. 01, 02, 03
{name}
the channel's previous name
The pattern Wedge {n:02} with starting number 1 produces
Wedge 01, Wedge 02, and so on. The numbering only
counts the channels that are actually checked.
Batch Rename is also part of Premium.
10. Preset settings
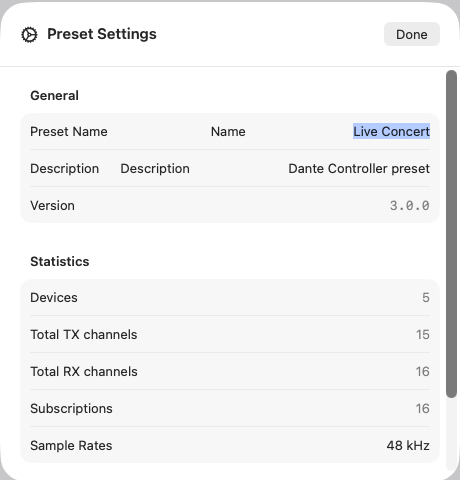
The Preset Info button next to the file name opens the
properties of the whole preset:
Name and description: free text. The description is the place for notes like "State after rig rebuild in Hall 2".
Clock subdomains: which subdomains appear in the preset.
Statistics: number of devices, sender and receiver channels, and how many receivers are actually connected.
The statistics are the fastest way to compare two presets without
clicking through both. They also show the preset's file-format
version and the sample rates present in the preset.
Name and description are free text. Below them, the preset's key
figures.
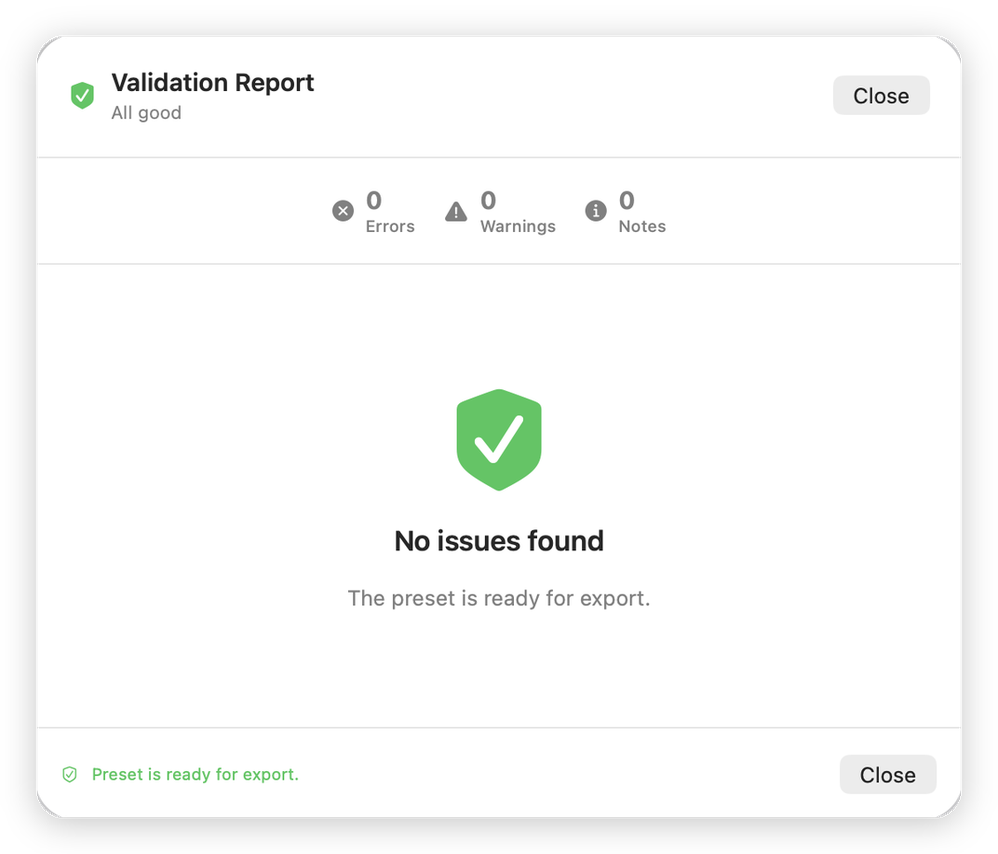
11. Validating before export
The Validate button, or ⌘⇧K,
checks the entire preset and opens a report. It separates findings by
severity.
Errors
Sample rates don't match
Sender and receiver run at different sample rates. The connection can't work like this.
Sender channel not found
A receiver points to a channel that doesn't exist in the preset. Typical after renaming or deleting devices.
Receiver already assigned
A receiver channel is assigned more than once.
Warnings
Different clock domain
Sender and receiver are in different clock subdomains.
Empty sender channel name
A TX channel has no name.
Device incompletely captured
The device was offline at export time, so some data is missing.
At the end there's an overall verdict that makes the decision for you:
Preset is ready to export – nothing found.
Export possible, review warnings – it'll work, but look before you leap.
Export not recommended – there are errors you should fix.
It's worth running validation as the last step before saving. It costs
two seconds and catches exactly the kind of mistake that would otherwise
only surface at soundcheck.
The report separates errors, warnings and notices, and states an overall verdict.
12. Saving and loading back
⌘S saves to the open file, Save As
creates a new one. For changes to a production preset, the second option
is worth it: the original state stays intact if you need to go back.
As long as unsaved changes exist, the "Save" button shows a colored dot.
If you try to close the window or the app, Patefact asks first, instead
of silently discarding your work.
You then load the saved file into your control software. It typically
shows a preview of the changes, which you have to confirm before
anything reaches the hardware.
13. Working with CSV
Export
CSV Export, or ⌘⇧E, writes out
the channel list as a table. That's how you document a routing, hand it
to colleagues, or process it further in a spreadsheet.
Import
CSV Import reads channel names from a table. If someone
sends you a ready-made channel list, you don't have to type it in by
hand.
Both features are also available in the free version.
14. App settings
Reached via Patefact → Settings, or ⌘,.
They're organized into three sections.
General
This is where the app language lives: system language
or one of the eight bundled languages. A change only takes effect after
a restart; the app offers to restart immediately.
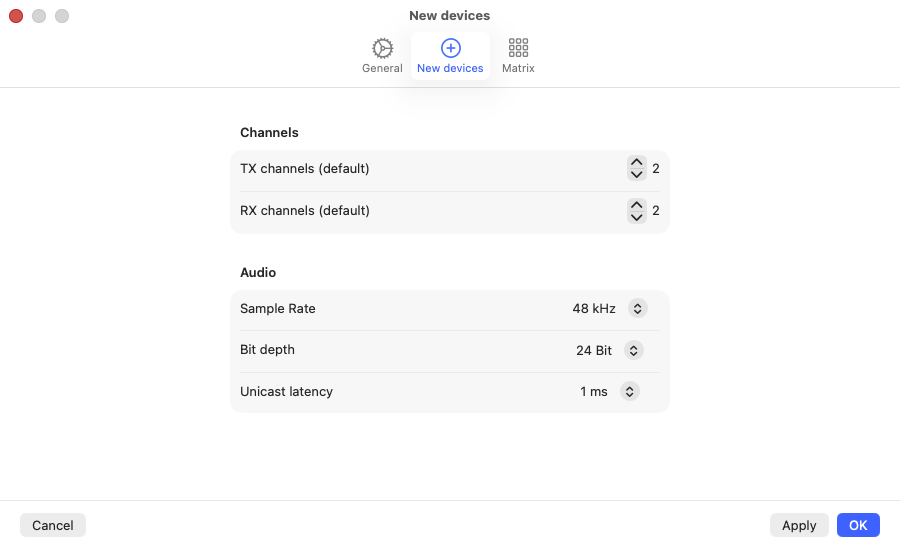
New Devices
Defaults for every newly created device: number of TX and RX channels,
sample rate from 44.1 kHz to 192 kHz, bit depth of 16, 24 or
32 bits, and the unicast latency. If you mostly work with the same kind
of hardware, set this once and save yourself clicks for the rest of the
year.
These defaults apply to every device you create afterward.
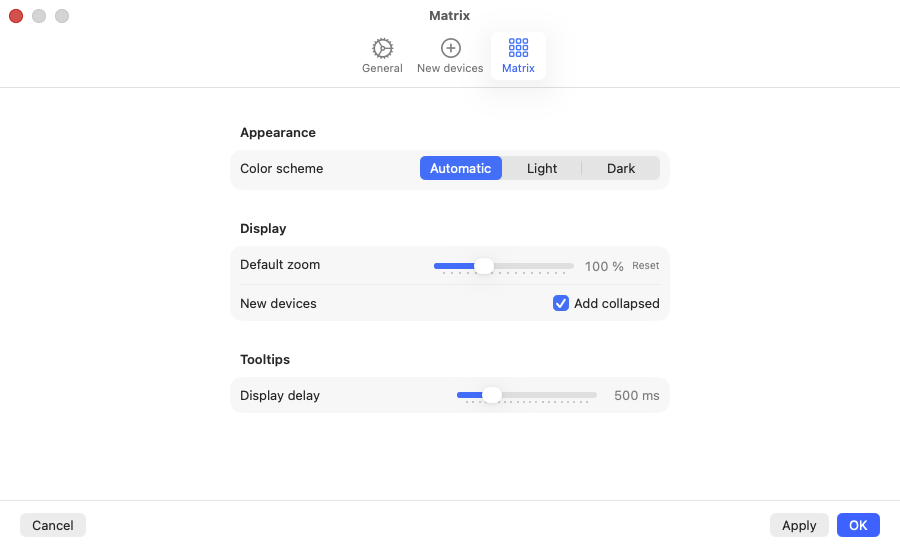
Matrix
Color scheme: Automatic, Light or Dark. The same setting as the toolbar button.
Default zoom: the magnification the matrix opens at. For large networks, a value below 100 % is worth it, so you see more right away.
Add new devices collapsed: when enabled, newly created devices start out collapsed. That keeps the view calm when you're creating several devices in a row.
Tooltip delay: how long the pointer has to rest on a channel before the tooltip appears.
Appearance, default zoom and tooltip behavior of the matrix.
15. On the iPad
The iPad version is the same app, not a stripped-down add-on. Matrix,
detail views, validation, settings and CSV export are all present. A
few interaction differences come from the device itself:
Tap instead of click: A single tap collapses or expands a device, a double tap opens the detail view, a tap on an intersection point sets or removes the connection.
The info panel is collapsed by default and is shown via the button on the right edge. On the Mac it's open right away.
Settings are reached via the gear icon in the navigation bar instead of the app menu.
Files come in through the Files app on the iPad. Patefact creates its own area there.
Share instead of Save As: CSV export goes through the usual Share menu.
Premium covers both platforms together. One purchase unlocks Mac and
iPad.
The same matrix on the iPad.
16. Keyboard shortcuts
⌘N
New preset
⌘O
Open preset
⌘S
Save
⌘⇧N
Add new device
⌘⇧K
Validate preset
⌘⇧E
Export as CSV
⌘Z
Undo
⌘⇧Z
Redo
⌘,
Settings
⌘W
Close window
In dialogs, Return confirms and Esc cancels. In
lists, you move with the arrow keys.
17. Lite and Premium
Patefact is fully usable for free. To review other people's presets and
for smaller setups, you don't need to buy anything. Premium removes two
limits and unlocks two features:
Lite
Premium
Devices per preset
up to 5
unlimited
Routes per preset
up to 20
unlimited
Device library
–
yes
Batch rename
–
yes
Everything else, the matrix, filters, zoom, detail views, making
connections, validation, naming channels individually, CSV import and
export, all eight languages, is included in both versions. The number
of presets is never limited.
If you hit a limit, the app tells you right there and offers the
upgrade. Premium is a one-time purchase and covers Mac and iPad
together.
Still have questions?
If something's missing here or an explanation doesn't help, write to
me. I take feedback like that and fold it back into the manual.